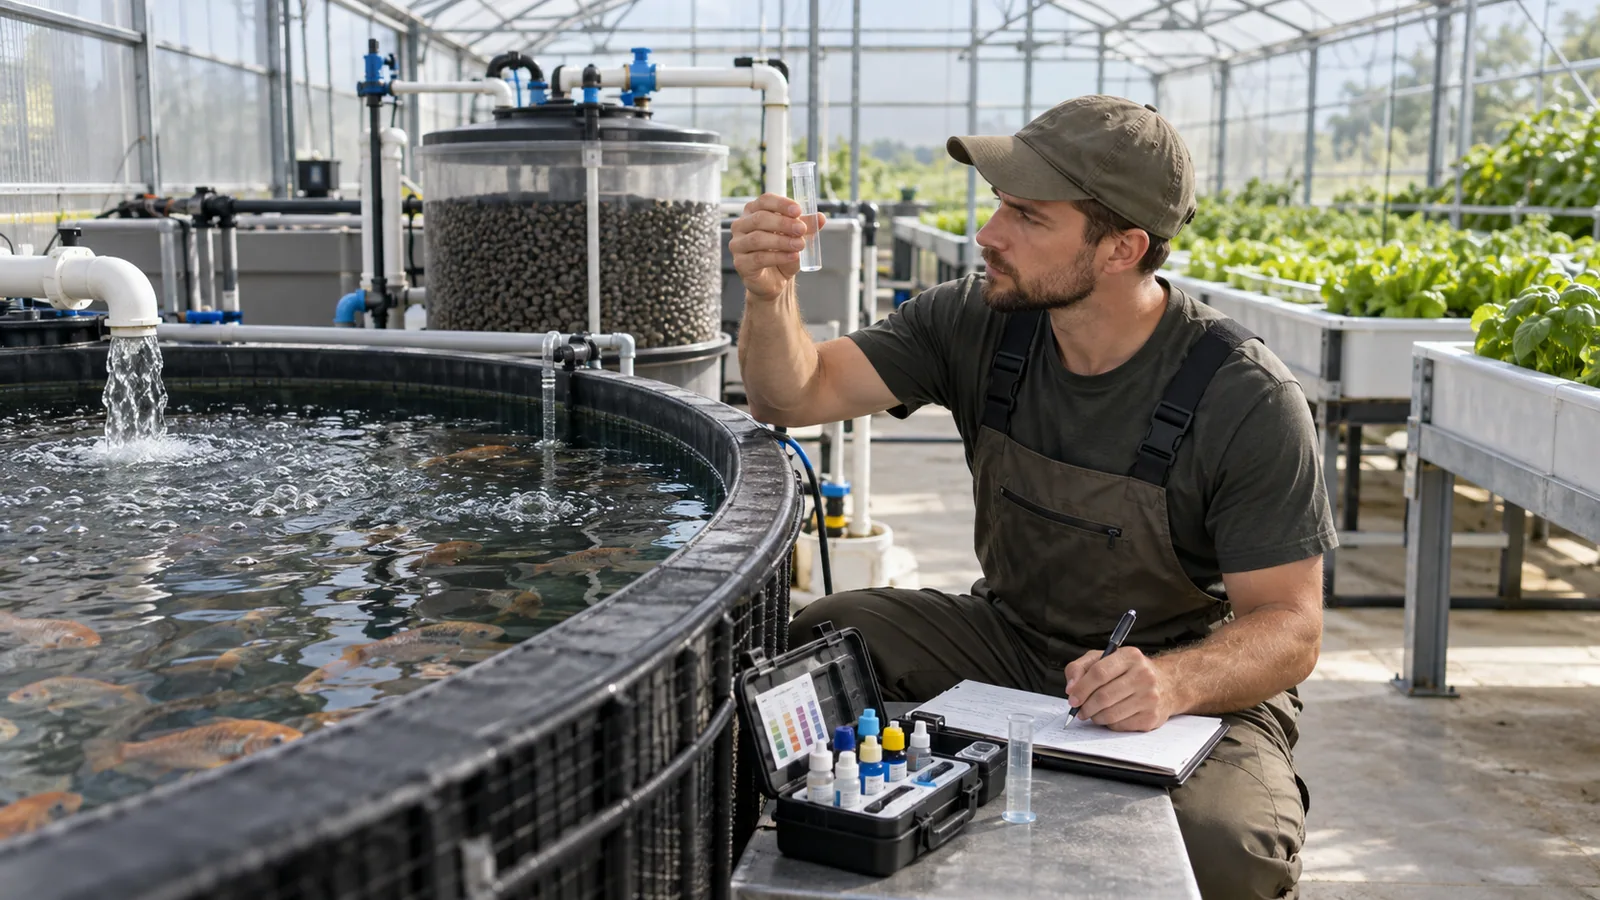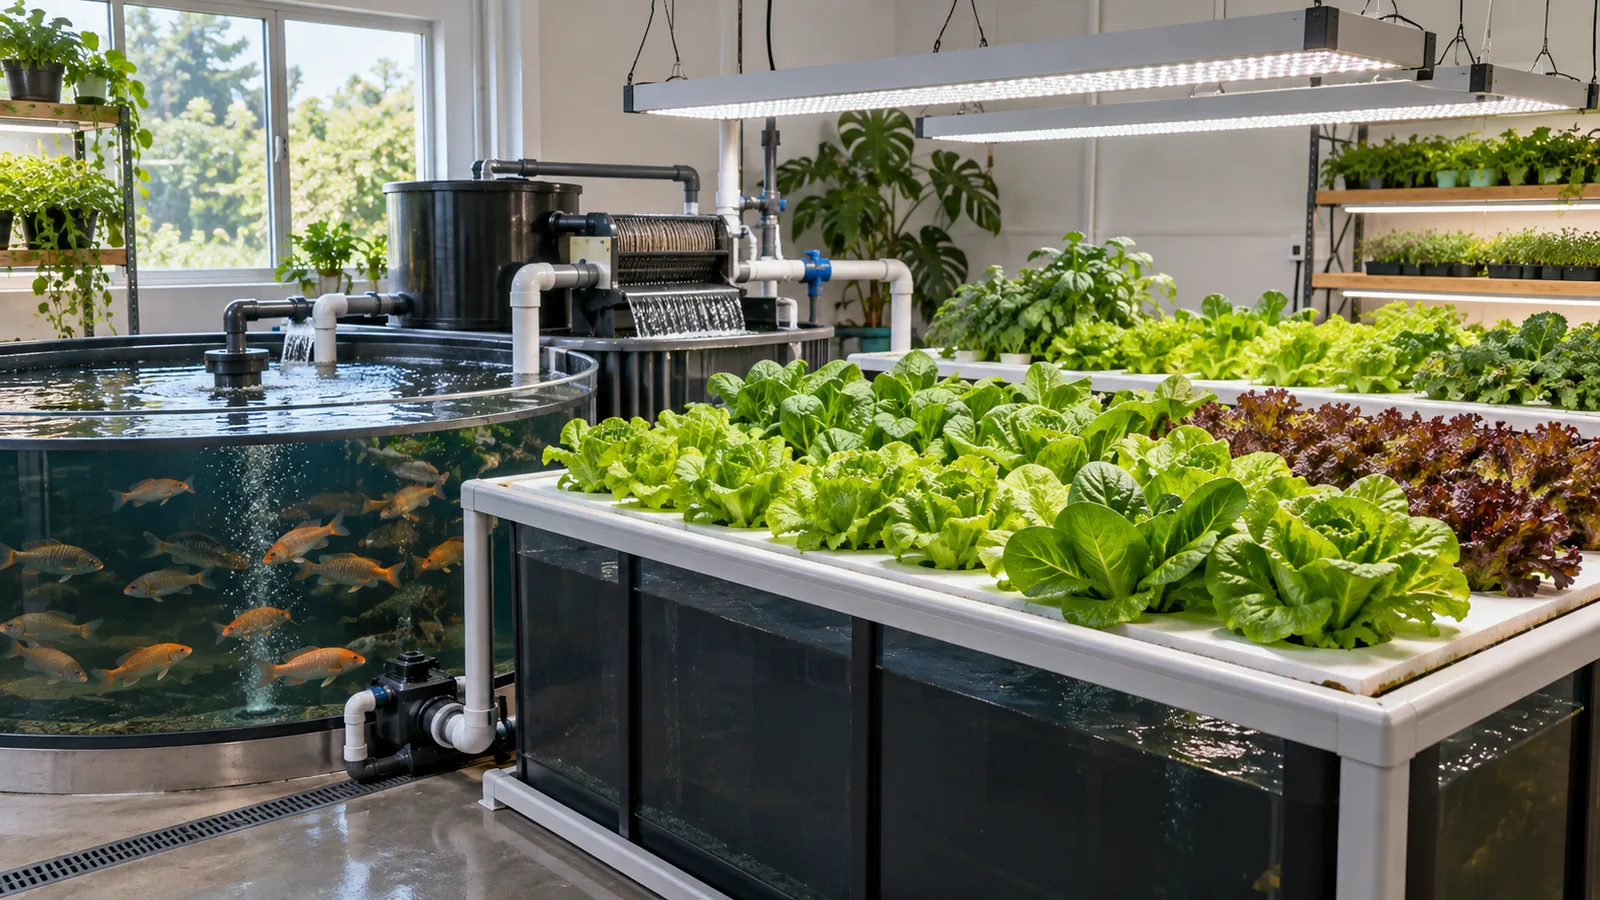
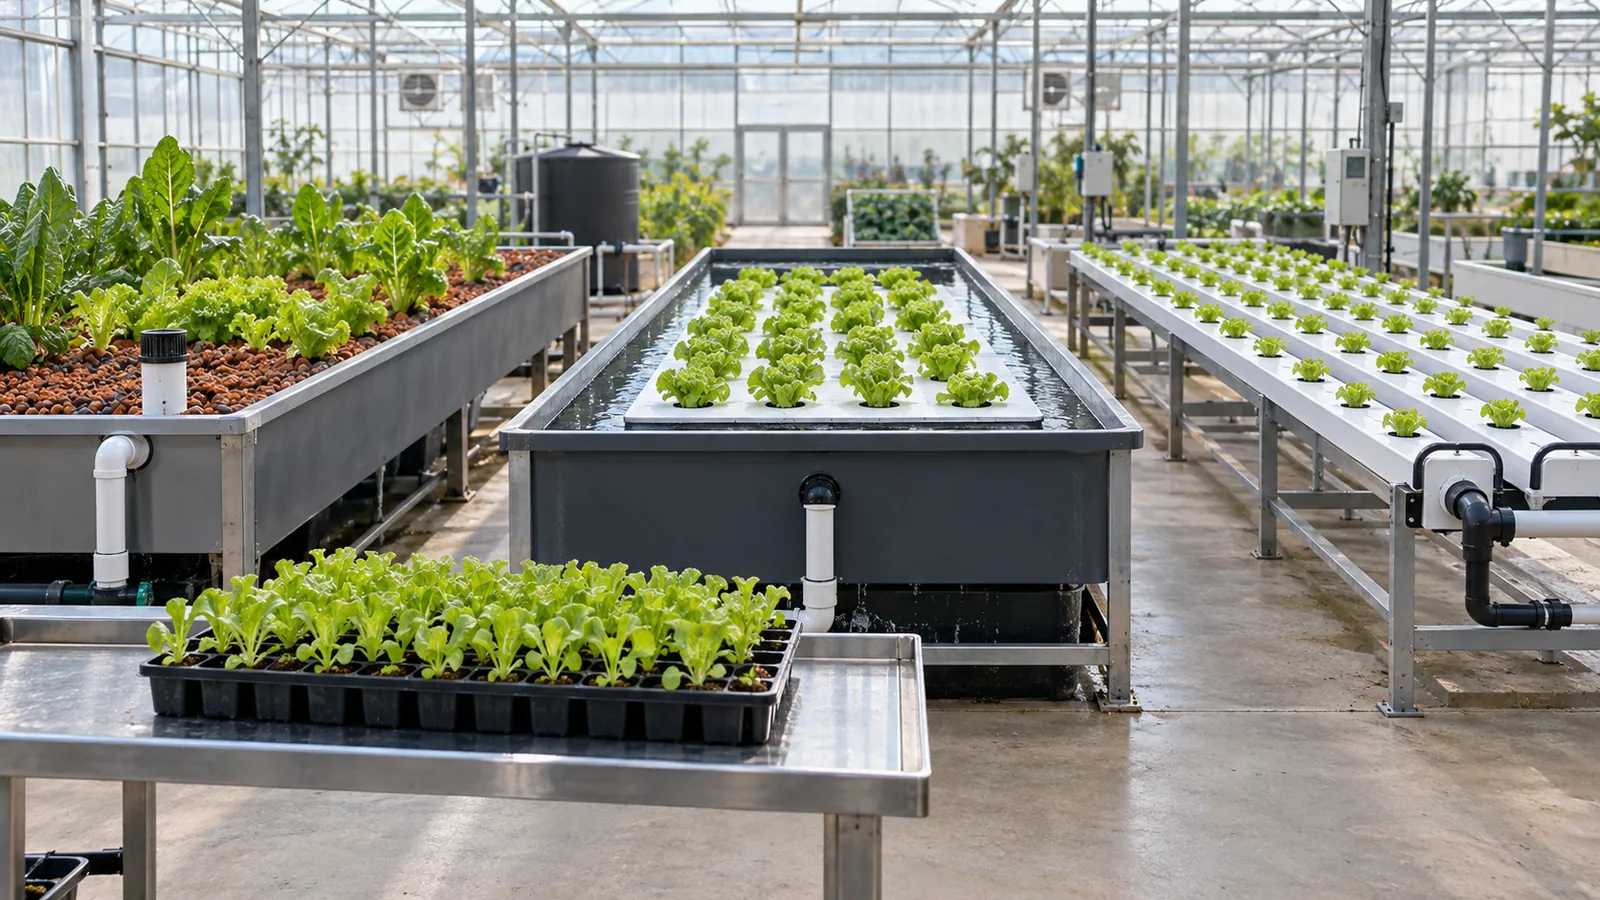
Adding plants to an aquaponics system is more than placing a seedling near circulating water. The plant must be at the correct growth stage, supported by a suitable plug or medium, positioned so its roots receive moisture and oxygen, and introduced without carrying excessive soil, pests or unsuitable crop-protection residues into the fish-water loop. The correct method also changes with the growing format: a media bed supports roots differently from a floating raft, NFT channel or vertical tower.
For a new installation, planting should be treated as part of commissioning. Before the first crop enters, operators should verify water movement, aeration, planting-site dimensions, nursery hygiene, drainage and the biological start-up plan. For an operating farm, transplanting should follow a repeatable schedule so that plant nutrient demand does not disappear at one large harvest and then return all at once.
This guide explains how to add seeds, plugs, cuttings and seedlings without pretending that one technique fits every aquaponics system. It is written for home growers, schools, greenhouse teams and overseas buyers preparing an equipment or installation scope.
The short answer
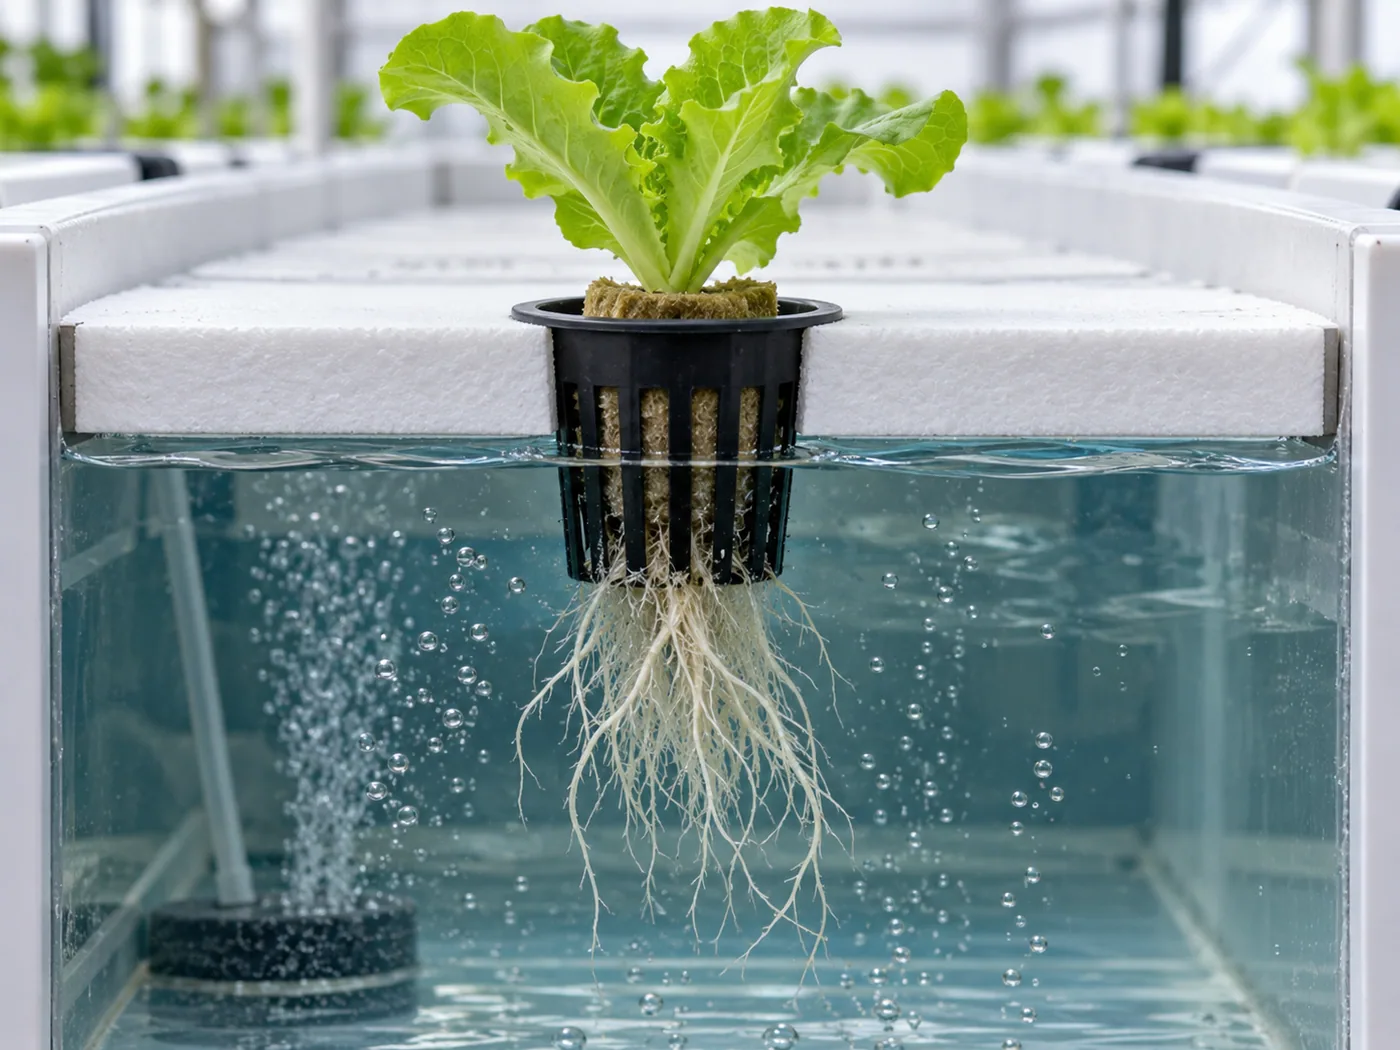
Most aquaponics growers start seeds in clean propagation plugs or another appropriate soilless nursery medium, then move healthy seedlings into the production system after the roots are established. Media-bed seedlings are supported in clean aggregate at the approved flood level. DWC seedlings are placed in net pots or plugs held by a raft, with young roots able to reach moisture and later extend into aerated water. NFT seedlings sit in correctly sized holders so roots contact the shallow flowing film without blocking the channel.
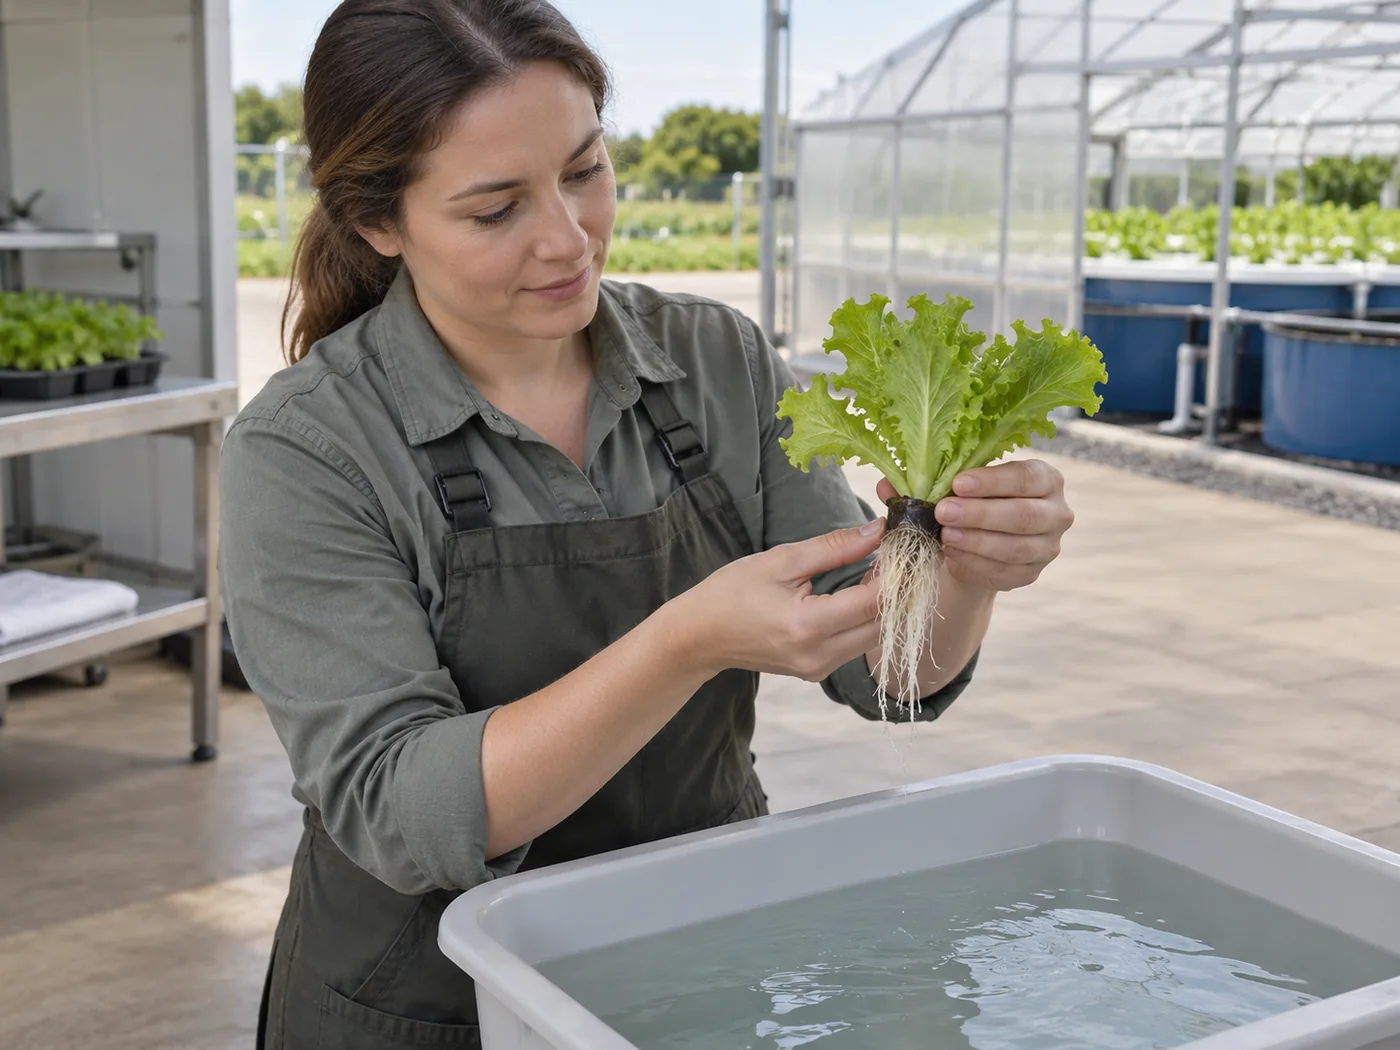
If a plant was raised in soil, remove loose soil carefully in a separate container of suitable water before it reaches the aquaponics loop. Inspect the leaves, stems, plug and roots for insects, eggs, disease and decay. Introduce a manageable crop block first, record survival and root condition, and expand only after water quality and plant response remain stable.
The FAO technical manual on small-scale aquaponic food production recommends establishing a separate nursery so that only strong, healthy seedlings enter the production loop and transplant shock is minimized. This approach also gives the operator replacement plants without sacrificing occupied grow-out space. Review the FAO aquaponics technical manual.
Decide how the plants will enter the system
Start seeds in a separate nursery
A small nursery gives the operator control over germination temperature, moisture, light and hygiene before valuable production sites are occupied. It also makes it easier to discard weak seedlings without disturbing fish water. Select a plug size that fits the raft hole, net pot, channel opening or media-bed planting method specified for the system.
The propagation material must remain structurally stable when wet and should not break apart into pumps or filters. Check whether the intended plug is approved for the crop, production method and destination-market requirements. Avoid assuming that a material is fish-safe simply because it is sold for horticulture. Ask for its composition, handling instructions and any treatment or binder information when those details are relevant.
Direct sowing
Direct sowing can work for some crops and media beds, but small seeds may move with flood water, fall too deeply into aggregate or germinate unevenly. It also makes crop counts and replacement planning less predictable. If direct seeding is tested, use a defined zone, control the moisture level and protect drains from loose material. Do not fill every production site until the germination method has been demonstrated.
Use cuttings only where appropriate
Basil, mint and some other crops can establish from cuttings. A cutting is not automatically cleaner than a seedling: it can carry insects, plant pathogens or residues from the mother plant. Source cuttings from healthy stock, keep them identified and establish a sanitation procedure that is compatible with fish and beneficial microorganisms. Never let an unverified disinfectant or rooting product drain into the aquaponics water.
Move a soil-grown seedling with caution
Soil-grown transplants are possible, but loose soil can add fine particles, organic matter, fertilizer salts, pesticides or organisms that were never evaluated for the fish loop. Remove the pot away from the system. Support the stem and root ball, loosen the outer medium gently, and rinse roots in a separate container rather than under a tap directly above the tank. Do not scrub or strip fine roots aggressively. Dispose of the rinse water through the site’s approved route.
Commercial transplant guidance from the Southern Regional Aquaculture Center emphasizes producing uniform, healthy transplants and managing hardening, irrigation and root contact so seedlings enter production ready to grow. See SRAC Publication 5011 on aquaponic vegetable transplants.
When should plants be added?
Plants can be placed during biological cycling in some start-up plans, but their presence does not prove that the biofilter is mature. Young seedlings use relatively little nitrogen, while fish and feed can add waste quickly. Follow the system’s documented cycling method and verify ammonia, nitrite and other relevant readings before increasing fish load. Our aquaponics cycling guide explains why plant arrival, bacterial establishment and fish stocking should be coordinated rather than treated as interchangeable milestones.
For an established system, transplant after confirming that circulation, aeration and root-zone water are normal. Delay planting if the operator is responding to an unresolved ammonia event, severe temperature excursion, pest outbreak, chemical exposure or equipment fault. A crop placed into unstable water may show symptoms that look like poor seedling quality even when the underlying problem is operational.
Match plant demand to system maturity. Leafy greens and herbs are often practical first crops because their support and nutrient requirements are manageable. Heavy fruiting crops may need mature nutrient cycling, stronger trellising and more deliberate potassium, calcium and iron management. Choose the crop from the actual fish load, water temperature, light, growing method and market plan—not from a generic list.
Prepare the system before transplanting
Confirm the planting interface
Measure the raft holes, net pots, channel openings, tower cups or media depth before ordering plugs and seedlings. A plug that is too small may fall into the water; one that is too large may be crushed, keep the stem too wet or prevent proper seating. Confirm the intended planting-site spacing and the mature canopy, not only the size of the young seedling.
Check water level and flow
In a media bed, the maximum wet level is normally kept below the upper dry layer so stems and bed surfaces are not continuously saturated. In DWC, the raft, plug and net pot should place young roots close enough to moisture without submerging the plant crown. In NFT, the channel slope and flow must deliver a shallow stream past the roots without flooding the stem or leaving new roots dry. Vertical systems need even distribution from the top to the lowest planting sites.
Verify aeration and temperature
New roots still respire and need oxygen. Check aeration in DWC and any zone where water moves slowly. Confirm water temperature is suitable for the selected crop and fish combination. A transplant can wilt because of heat, cold, low root-zone oxygen or poor light even when the planting technique itself was correct.
Clean planting surfaces
Remove old roots, algae and loose debris using the approved cleaning method. Inspect rafts, channels and net pots for cracks or rough edges that could damage roots. Cleaning must not leave residues that threaten fish, bacteria or edible crops. Record which surfaces were cleaned, when they were returned to service and whether they were rinsed.
A practical transplanting procedure
1. Select uniform seedlings. Choose plants with healthy color, a stable plug, intact roots and no visible pests, webbing, eggs, rot or stem injury.
2. Identify the crop and batch. Record species, variety, seed lot where relevant, sowing date and planned transplant zone.
3. Inspect away from production water. Use a receiving or nursery area with good light. Quarantine unfamiliar plant material when practical.
4. Remove unsuitable external media. For soil-grown plants, loosen and rinse the roots carefully in a separate container. Do not let soil wash into the system.
5. Seat the plant at the correct height. Keep the crown and stem base out of continuously wet conditions unless the crop-specific method requires otherwise.
6. Support the plant without compression. The holder must prevent tipping while leaving room for root growth and water movement.
7. Confirm root access. Make sure young roots can reach the intended moisture or water film. Do not assume they will bridge a large dry air gap immediately.
8. Label the zone. Record transplant date, quantity and operator. Labels should not fall into channels or obstruct harvest.
9. Observe after circulation resumes. Look for displaced plugs, blocked flow, leaking rafts, collapsed seedlings or roots pulled into drains.
10. Review at 24 hours and during the first week. Record survival, wilting, new root growth, pests and unusual water readings.
How the method changes by system type
Media-bed aquaponics
Create a planting opening without forcing sharp aggregate against the stem. Position the established roots where they will receive moisture during the normal flood pattern, then support the seedling gently with the approved media. Keep the plant crown in the upper dry zone. After the first flood-and-drain cycle, confirm that the plant remains upright and that loose media has not entered the standpipe or siphon guard.
Media beds can hide accumulated roots and solids. When replacing a crop, remove the old root mass rather than pushing a new seedling into decaying material. Inspect the local flow path and watch for slow draining. A planting routine should include bed-surface housekeeping and drain protection.
Deep-water culture and floating rafts
Use the specified plug or net pot and seat it securely in the raft. Young roots should be able to reach the moist zone; established roots will hang into the aerated water below. Do not submerge the stem or leaves. Keep the raft surface covered except at planting holes to reduce light entry and algae growth.
Distribute seedlings by age or crop block so operators can move rafts logically toward harvest. Confirm that roots are not immediately wrapped around an air line, sensor or structural support. Lift a representative raft after planting to check root position and water contact without tearing the roots.
Nutrient film technique
NFT gives young plants less stored water than DWC, so flow interruption can become visible quickly. Ensure the plug or net pot contacts the intended water film. Avoid long roots or loose propagation material that can obstruct the narrow channel. Verify flow at the far end, not only near the inlet, and inspect the return for roots or debris.
Towers and vertical planters
Place plants securely without compressing the stem. Run the system and inspect every level for wetting before loading the entire tower. The top planting sites should not receive excessive flow while lower sites remain dry. Use our safe aquaponics pest-control guide to plan how new transplants are inspected before they enter a dense vertical canopy.
Reduce transplant shock
Transplant shock may appear as temporary wilting, stalled growth, leaf edge damage or root discoloration. It can result from root injury, a sudden change in light or temperature, unsuitable pH, low dissolved oxygen, excessive flow, poor water contact or an unhealthy seedling. Do not respond automatically by adding fertilizer.
Move plants during a cooler part of the operating day where practical, minimize the time roots are exposed, and avoid placing tender nursery plants directly under intense light without acclimation. Maintain the normal water-quality and aeration plan. Remove dead plant material promptly, but give viable seedlings time to establish before making several changes at once.
Compare the transplant zone with an unaffected zone. Check water contact, root color, flow, temperature, pH and visible pests. If only one batch is affected, review its nursery, handling and planting depth. If multiple crops change at the same time, investigate the shared water and environment.
Use staggered planting to stabilize production
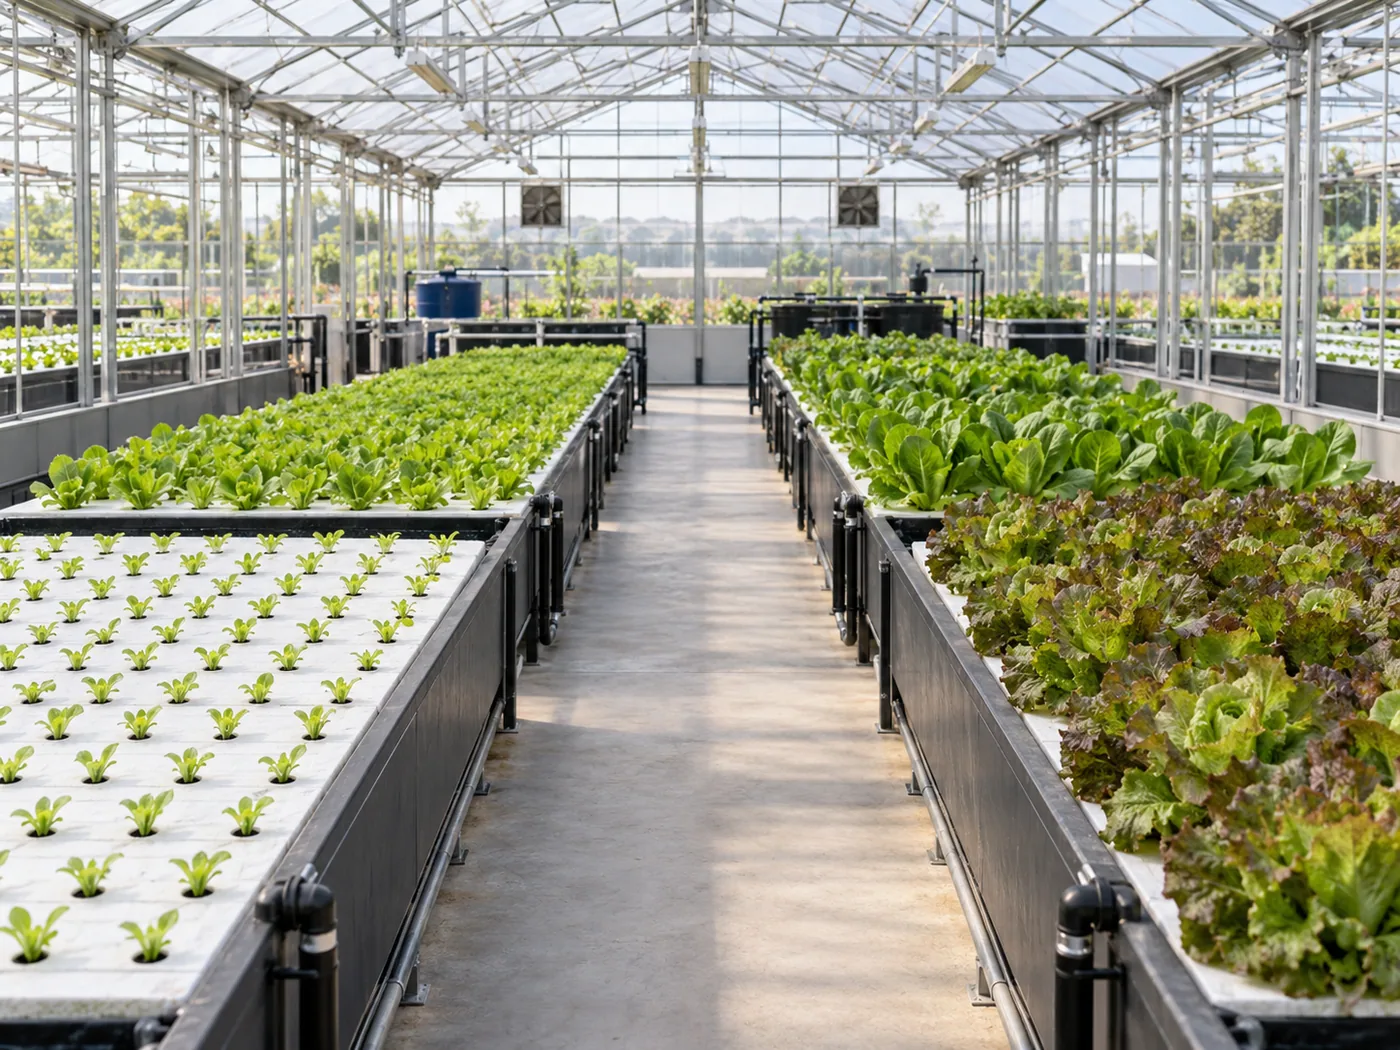
Filling every site on one day creates one large transplant event and, later, one large harvest gap. A staggered schedule—such as a defined number of sites each week—spreads labor and keeps plant uptake more consistent. The exact schedule depends on crop time, market volume and available nursery space.
Maintain a crop board or digital record with sowing date, transplant date, location, expected harvest date and actual outcome. Record the percentage of seedlings that become usable production plants, not only germination. If repeated losses occur at one channel or raft position, investigate flow, light and access before blaming the seed supplier.
For an indoor leafy-green layout, our system comparison for leafy greens explains how DWC, NFT and media formats change transplant and harvest workflow.
Factory testing, shipment inspection and installation preparation
Plant establishment is performed at the operating site, not during equipment factory testing. A supplier can, however, confirm that raft holes, net pots, channels, towers and grow-bed dimensions match the approved drawings. A demonstration using clean, non-living sample plugs may verify fit and water contact without pretending that crop performance has been proven.
During shipment inspection, count rafts, net pots, propagation accessories, channel covers, supports and spare parts. These components should be dry, clean, protected from deformation and packed so that sharp fittings do not damage planting surfaces. Do not ship live plants inside tanks or install plants in equipment prepared for container transport.
Before planting at the destination, verify that the site has suitable nursery space, source-water treatment, lighting, pest exclusion, drainage, handwashing and clean tools. Confirm responsibility: who receives seedlings, who releases them from quarantine, who records planting and who responds if a crop shows stress.
Mid-article CTA — Send Your Planting Requirements
Contact YAFAN with your crop list, grow method, planting-site count, plug or net-pot size, planned transplant schedule and project country. We can help organize an equipment and installation-preparation checklist for supplier comparison.
Common mistakes to avoid
- Adding soil-covered roots directly to the fish-water loop.
- Filling every production site before flow and plant survival are tested.
- Letting the stem or crown remain continuously submerged.
- Using a plug that does not fit the raft or channel opening.
- Introducing nursery pesticides without evaluating fish and biofilter safety.
- Treating wilt as proof of nutrient deficiency without checking roots, flow, light and temperature.
- Planting a high-demand crop before the fish, bacteria and operating team can support it.
- Ignoring pests on the underside of leaves or inside the plug.
- Allowing roots, labels or loose media to block drains and narrow channels.
- Replacing harvested plants without removing old root material and cleaning the site.
FAQ
Can you put plants into aquaponics before adding fish?
Some cycling plans introduce seedlings before fish, but plants do not replace the need to establish and verify biological filtration. Coordinate plant timing with the chosen cycling method and do not use young plants as justification for adding a large fish load.
Can seeds be planted directly in an aquaponics grow bed?
Some can, but small seeds may move, become buried or germinate unevenly. Starting seedlings in compatible plugs usually gives better control over spacing, counting and transplant timing.
Do you have to remove all soil from plant roots?
Remove loose soil and unsuitable potting material as thoroughly as practical without destroying the fine roots. Rinse in a separate container and keep the rinse water out of the aquaponics loop. If the plant may carry pesticides or disease, isolation may be more important than washing alone.
How large should seedlings be before transplanting?
There is no universal height. Look for a stable plug, healthy first true leaves, roots that hold the plug together and a size appropriate for the holder and crop. Avoid severely root-bound, stretched or flowering seedlings unless the crop plan specifically allows them.
Why are new aquaponics plants wilting?
Possible causes include root damage, poor contact with water, excessive light, temperature change, low root-zone oxygen, unsuitable pH, pests or unhealthy nursery stock. Check the physical planting position and shared water conditions before adding nutrients.
How many plants should be added at one time?
Start with a manageable batch that the operator can inspect and record. The right number depends on system maturity, existing crop demand, fish feed input, filtration and production schedule. Staggered planting is usually easier to evaluate than filling every site at once.
Conclusion
The safest way to add plants to an aquaponics system is to begin with healthy, traceable seedlings or plugs, inspect them away from fish water, remove unsuitable soil and residues, and position the roots according to the actual grow method. Media beds, DWC rafts, NFT channels and towers require different planting depths and support details, but all need stable water, oxygen, clean handling and a practical crop schedule.
Treat the first planting as a commissioning stage. Record what was planted, where it was placed and how it responded. Correct physical problems before adding products, and expand plant numbers only after the system and operating team demonstrate stable performance.
Final CTA — Ask for a Planting and Installation Checklist
Contact YAFAN with your system drawing, crop plan, planting format, nursery method and target capacity. We can help prepare a clearer request for grow modules, planting accessories and site commissioning support.